

In some cases, newer water meters are equipped with a pulse output. However if you have an older power meter without a pulse output, then you might be able to use one of the options below to sense your water consumption.
Use the TCRT5000 IR Barrier Line Track sensor. It emits an infrared light and detects the reflection. If you aim it at the fastest turning hand on your meter, you can detect pulses or a rate.
Some water meters emit a fluctuating magnetic field that can be detected by using a Hall effect sensor. Instructions are available here.
The sensor example sketch counts the pulses from your attached sensor and converts it into liters or gallons per minute and the cummulative water volume.
There are a few parameters that need to be tuned to your water meter. Set the PULSE_FACTOR to the number of revolutions per cubic-meters (or gallons) of water.
You can also set the frequency that the sensor will report the water consumption by updating the SEND_FREQUENCY. The default frequency 3 times per minute (every 20 seconds). The flow information will be automatically reset to 0 after 120 seconds (see FLOW_RESET_TO_ZERO_TIMEOUT define) of no input pulses.
The sensor has two modes of operation:
SLEEP_MODE = true
Use this mode if you power the sensor with a battery. In this mode the sensor will sleep most of the time and only report the cumulative water volume. Unfortunately the sensor cannot report the current water flow rate because the sensor can not track time while sleeping; the elapsed time between two blinks is required to calculate the current flow rate.
SLEEP_MODE = false
In this mode the sensor will not sleep and will report the current water flow rate and the cumulative water consumption to the gateway. This mode requires constant power so you will need to connect the sensor to an electrical outlet.
Usage with Home Assistant Controller
The sensor automatically register itself to home assistant controller which will release a NODE_ID to this sensor (through the gateway). If everything is fine, the NODE_ID will be set in the sensor EEPROM, and the board will get an initial counter value of 0 from Home Assistant. At this point, the sensor and Home Assistant are paired. The initial provisioning writes a flag in the sensor EEPROM indicating that the counter has been correctly provisioned to the sensor by Home Assistant, so that the board will start to use the counter incrementing on received pulses just after this event. The effect of this procedure is also that if you provision another sensor setting the same NODE_ID, you will get the current counter value from Home Assistant on the first startup.
Factory Reset
Just in case you want to register the sensor using another NODE_ID, you will need to factory reset this sensor. For user convenience, in the source code you will find a FORCE_FACTORY_RESET define that will allow you (uncommenting the line) to factory reset the board on startup (resetting NODE_ID and also the pulse counter provisioning flag). Once you started the board with this definition, you will see in the serial log that the board has been reset, so you can comment again this line in order to proper run the board as usual. Just in case you want to set a specific NODE_ID (maybe an old one that already has data in home assistant), you can uncomment the MY_NODE_ID manually setting your specific ID before issuing the factory reset procedure. After that you can comment back again this line.
Setting a specific Volume counter value
Should be the case where you want your volume counter to start from a specific value (e.g. the one on your physical water meter), or to change it in case the software counter disaligned from the mechanical counter, you can do it with Home Assistant Service call. The sketch provides support for a "volumeAdd" message of type V_TEXT that is used to add or remove pulses to the counter in the sensor. In order to do that you will go to Home Assistant service call helper (in the developer tools), go in yaml mode and use these:
service: notify.mysensors
data:
message: VALUE_TO_ADD
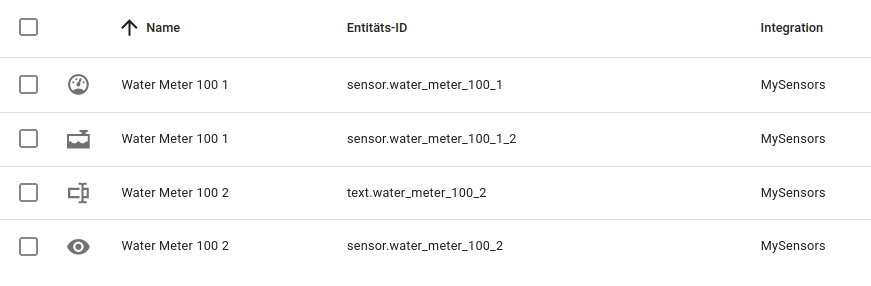
target: Water Meter NODE_ID 2
you will need to set:
VALUE_TO_ADD to a numeric (positive or negative) integer value that will be added to the existing counter. Mind that currently this may go in overflow if you use too big values. The number is expressed as "pulses" units, so if you want to add 1.234 m3 to the current value of volume (e.g. 1000 m3) you will set here 1234 and just after some seconds you will find 2.234 m3 in the volume shown by Home Assistant.
NODE_ID to the one assigned to your sensor. 2 is the child entity and will correspond to the text of S_INFO entity attached to this device (you see this in the entities)
Wiring Things Up
Start by connecting the radio module.


| Sensor |
Arduino |
Comment |
| GND |
GND |
Black |
| VCC |
VCC (3.3 - 5V) |
Red |
| DO (digital out) |
Digital pin 3 (D3) |
Green |
Example
#define MY_DEBUG
#define MY_RADIO_RF24
#include <MySensors.h>
#define DIGITAL_INPUT_SENSOR 3
#define PULSE_FACTOR 1000
#define SLEEP_MODE false
#define MAX_FLOW 40
#define CHILD_ID 1
uint32_t SEND_FREQUENCY =
30000;
MyMessage flowMsg(CHILD_ID,V_FLOW);
MyMessage volumeMsg(CHILD_ID,V_VOLUME);
MyMessage lastCounterMsg(CHILD_ID,V_VAR1);
double ppl = ((double)PULSE_FACTOR)/1000;
volatile uint32_t pulseCount = 0;
volatile uint32_t lastBlink = 0;
volatile double flow = 0;
bool pcReceived = false;
uint32_t oldPulseCount = 0;
double oldflow = 0;
double oldvolume =0;
uint32_t lastSend =0;
uint32_t lastPulse =0;
#if defined(ARDUINO_ARCH_ESP8266) || defined(ARDUINO_ARCH_ESP32)
#define IRQ_HANDLER_ATTR ICACHE_RAM_ATTR
#else
#define IRQ_HANDLER_ATTR
#endif
void IRQ_HANDLER_ATTR onPulse()
{
if (!SLEEP_MODE) {
uint32_t newBlink = micros();
uint32_t interval = newBlink-lastBlink;
if (interval!=0) {
lastPulse = millis();
if (interval<500000L) {
return;
}
flow = (60000000.0 /interval) / ppl;
}
lastBlink = newBlink;
}
pulseCount++;
}
void setup()
{
pinMode(DIGITAL_INPUT_SENSOR, INPUT_PULLUP);
pulseCount = oldPulseCount = 0;
request(CHILD_ID, V_VAR1);
lastSend = lastPulse = millis();
attachInterrupt(digitalPinToInterrupt(DIGITAL_INPUT_SENSOR), onPulse, FALLING);
}
void presentation()
{
sendSketchInfo("Water Meter", "1.1");
present(CHILD_ID, S_WATER);
}
void loop()
{
uint32_t currentTime = millis();
if (SLEEP_MODE || (currentTime - lastSend > SEND_FREQUENCY)) {
lastSend=currentTime;
if (!pcReceived) {
request(CHILD_ID, V_VAR1);
return;
}
if (!SLEEP_MODE && flow != oldflow) {
oldflow = flow;
Serial.print("l/min:");
Serial.println(flow);
if (flow<((uint32_t)MAX_FLOW)) {
send(flowMsg.set(flow, 2));
}
}
if(currentTime - lastPulse > 120000) {
flow = 0;
}
if ((pulseCount != oldPulseCount)||(!SLEEP_MODE)) {
oldPulseCount = pulseCount;
Serial.print("pulsecount:");
Serial.println(pulseCount);
send(lastCounterMsg.set(pulseCount));
double volume = ((double)pulseCount/((double)PULSE_FACTOR));
if ((volume != oldvolume)||(!SLEEP_MODE)) {
oldvolume = volume;
Serial.print("volume:");
Serial.println(volume, 3);
send(volumeMsg.set(volume, 3));
}
}
}
if (SLEEP_MODE) {
sleep(SEND_FREQUENCY, false);
}
}
void receive(const MyMessage &message)
{
if (message.getType()==V_VAR1) {
uint32_t gwPulseCount=message.getULong();
pulseCount += gwPulseCount;
flow=oldflow=0;
Serial.print("Received last pulse count from gw:");
Serial.println(pulseCount);
pcReceived = true;
}
}


 Water Meter Pulse Sensor

